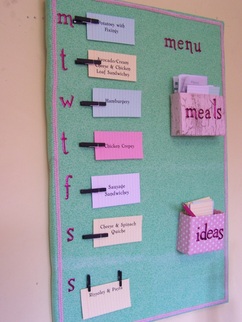
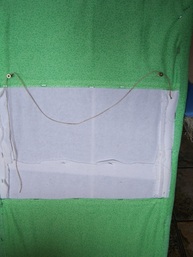
This is what the back of mine looks like.

| 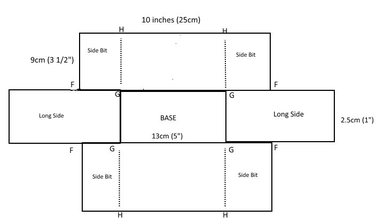 IMAGE 10 IMAGE 10 What I used - piece of timber – 40cm x 75cm or 16 inches x 30 inches - under fabric (I used and old thin blanket – it is to protect your main fabric from damage especially at the corners) 55cm x 100 cm or 22 inches x 40 inches - main fabric - 55cm x 200cm or 22 inches x 40 inches - contrasting colour braid or ribbon or lace. 3m or 120 inches - letters – stickers - cards – I bought a box of 10cm x 15cm reference cards and cut them in half - cardboard (for the boxes) I used the cardboard from some old shoe boxes - pretty paper – I used scrapbooking paper since it was a good size and oh so many pretties to choose from! - Pen - Craft pegs - Staple gun and staples - Hot glue gun ( you can use normal craft glue, it just takes a lot longer to dry) - Small nails, tack hammer, drill with a small bit (you can just use glue instead of nailing the stuff – hubby suggested I use the nails and got me all the bits and pieces and helped. - Sticky Tape - Pencil and Ruler - Glue stick HOW TO PUT IT ALL TOGETHER
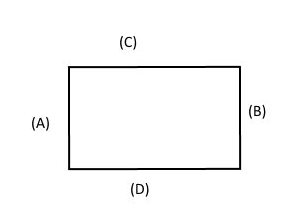
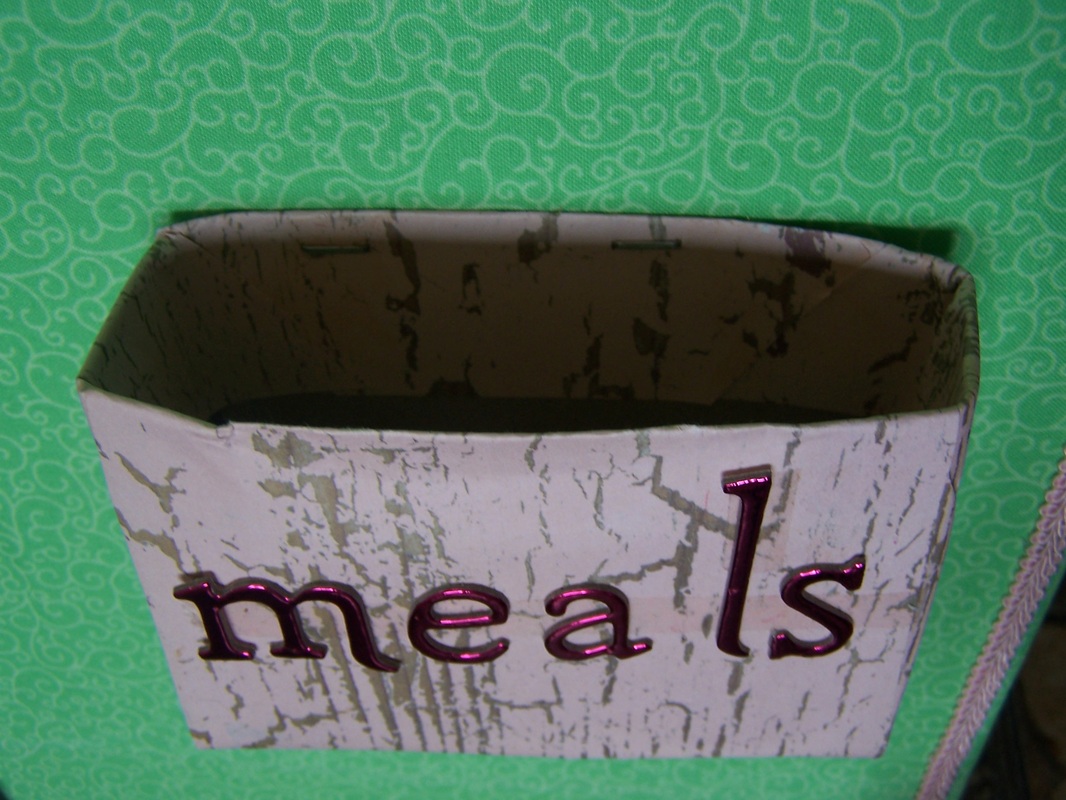
4. Do the same for all 4 corners and then go along side (C) and (D) making sure it is all flat and straight, put in about 5 staples. Use more if you need to. 5. REPEAT with you Main fabric over the top. 6. Turn it over and admire your work. 7. Next we need the hot glue gun. 8. Take your braid/ribbon/lace. And lay it around your edge to see how it is going to sit and check how close you want it to the edge. (I took a pencil and a ruler and drew a barely visible line ¼ inch from the edge so I had a straight line to follow). 9. Using your glue, in short strips (about 10cm or 4 inches at a time) lay the glue down on your line then lay your braid over it. Continue until you reach the corner. Using a pin hold the braid at the corner then turn the braid at a right angle and continue along the next edge. Repeat this for all 4 sides. 10. When you have reached the end cut it so that the last little bit overlaps the starting point. And glue it down well. Use lots of glue here – you don’t want it to fray and come apart. 11. Now we need to work out the distance we wan each card to be. I had 7 cards down the side so I just divided the length by 7. Which gave me 10.7cm or just over 4 inches. 12. I got some chalk and made a tiny mark at 2 (5cm) and 4 inches (10cm) all the way down side (D). This is where we are going to put the pegs. 13. Take your stickers for Monday (M), Tuesday (T), Wednesday (W), Thursday (T), Friday (F), Saturday (S) and Sunday (S). And place them on the board at the 1st mark and then every 2nd mark. YOU CAN JUST GLUE THESE PEGS INSTEAD - IF YOU ARE GLUING YOU DON’T NEED TO TAKE THE PEGS APART. 14. Take apart the pegs and drill a hole for a small nail near the end of each peg (ONLY ONE SIDE OF THE PEG THOUGH!) 15. Nail these peg pieces into the board next to the stickers. (My project only has 6 done this way, the bottom small pegs are glued on – I ran out of the bigger ones and didn’t want to spend $8 on one peg). OK NOW THE BOXES – make 2 of these
3. At the sides (C) and (D) draw a rectangle 9cm x 25cm (3 ½” x 10”) IT SHOULD LOOK LIKE IMAGE (10) (Sorry the image is so small - I am still learning to do this) 4. Cut the shape out. Then cut where I have marked from F to G. 5. Fold all the lines that are marked – this will make it sit better. Stand the box up on its base. 6. Fold the sides (A) and (B) in to stand up. Make a fold along the dotted lines. 7. Fold side (C) and (D) up as well. You are going to wrap those side bits around over the top of the long sides. If the side bits over lap trim them down. 8. Tape these sides up. And tape the long side to the side bits. 9. You now have a box. 10. Cover these with your pretty papers. I cut the paper shape the same as above but longer so that when I glued it I could fold the longer parts over and into the box, giving it a nice clean folded edge all the way around. 11. Using your hot glue gun again, glue the pretty boxes where you want them on the left side of your board. (Don’t forget to leave room for your “MENU” stickers above) 12. Use your stickers to make you “MENU” , “MEALS” and “IDEAS” signs With your cards. You can hand write them or print them out. I used MS Word and created a custom paper size. Printing the recipes 2 per sheet then cutting the cards in 2. I am going to write all the ingredients on the back of each card to make, making my shopping list easier. I HOPE THIS MAKES SENSE AND YOU GET THE BOARD YOU WANT. IF YOU DO MAKE ONE – I’D LOVE TO SEE THE PHOTOS ANY AND ALL COMMENTS ARE WELCOME IF YOU NEED HELP YOU CAN LEAVE ME A COMMENT, EMAIL ME, OR IF YOU HAVE FOUND THIS THROUGH A FB GROUP – MESSAGE ME THERE – I AM HAPPY TO HELP!!! THANKS FOR READING THIS WORDY TUTORIAL The original blog I got this from is http://www.pinterest.com/pin/515662226058055863/ |

 RSS Feed